Kehidupan hati, adalah sumber dari segala kebaikan. Kematian hati, adalah sumber dari segala keburukan. Hati tidak bisa hidup dan sehat, kecuali dengan menjadikan Allah SWT, sebagai Tuhannya, tujuan hidupnya, dan Sesuatu yang paling dicintainya." (Ibnul Qoyyim Al-Jauziyah)

HOT NEWS

Senin, 29 November 2010

BAGAIMANA CARA MENGUPLOAD WEBSITE KE HOSTING


Ketika website anda telah selesai dibuat di komputer pribadi anda, maka proses selanjutnya yang harus anda lakukan adalah meng-upload file-file website anda ke server Hosting (root host OnLine).
Untuk proses upload dapat dibagi dalam dua cara:
1. Dengan menggunakan FTP,
2. Dengan menggunakan file manager yang terdapat pada Cpanel website kita.

Cara Mengupload website ke Hosting melalui FTP (File Transfer Protocol)
Artikel ini akan mencoba menuntun anda dalam melakukan proses upload dengan menggunakan FTP. Software FTP yang digunakan sebagai contoh pada artikel ini adalah FileZilla, anda dapat men-downloadnya dari SourceForge.net . Sekedar saran, gunakan mirror yang paling dekat dengan lokasi anda, agar proses download dapat berjalan dengan cepat. Setelah download selesai, silahkan install file tersebut dan anda dapat langsung menggunakannya.
Petunjuk umum pada FileZilla:

view me :


Keterangan:
  1. Menunjukkan isi dari komputer anda (komputer dimana FileZilla diinstall). Informasi yang diberikan adalah berupa drive-drive dan folder-folder yang terdapat pada komputer anda. Anda dapat meng-klik tanda (+) untuk menuju ke folder tempat file-file yang akan di-upload, atau anda dapat pula mengetikkan path langsung ke folder tersebut.
  2. Merupakan isi dari folder yang anda tuju,
  3. Jendela Message (pesan). Berisi respon dari perintah yang dikirim oleh FileZilla, pesan2 tersebut dapat berupa:
  4. Status:
    Menunjukkan status dari operasi yang dilakukan. Contohnya: “Connecting to (server)…” atau “Retrieving directory listing…”
    Error:
    Merupakan pesan kesalahan (selalu ditunjukkan dengan warna merah). Terjadi jika terdapat kesalahan pada operasi yang dilakukan atau bisa juga karena sebuah operasi dihentikan secara langsung oleh pengguna.
    Command:
    Menunjukkan perintah yang sedang dikirim oleh FileZilla ke server
    Response:
    Menunjukkan respon yang diberikan oleh server. Jika pada digit pertama menunjukkan angka 2 atau 3 berarti operasi yang dilakukan sukses, jika 4 atau 5 berarti gagal
  5. Jendela Remote Computer (server),

  6. Status transfer file.

view me :


view me :


Melakukan Koneksi ke server
view me :


Quick connection bar
Pada quick connection bar, anda ketikkan informasi berikut:
  • Di bagian address: ketik url website anda, tanpa http://, atau dengan format: www.testing.com
  • Untuk username dan password yang digunakan secara default adalah username dan password cPanel anda.
  • Kosongkan saja bagian port, karena akan diisi secara otomatis oleh FileZilla (sekedar informasi, port untuk FTP adalah 21).

Upload File
view me :


Tampilan jika koneksi berhasil
Jika koneksi telah berhasil dilakukan, maka anda dapat melakukan proses upload. Terlebih dahulu, pastikan anda masuk ke folder public_html pada website anda, karena public_html adalah folder tempat file-file anda akan ditampilkan, kalau di local sering disebut dengan htdocs.
view me :


klik dua kali pada folder public_html
Kemudian, anda dapat menseleksi file (pada local site) yang akan anda upload, lalu klik kanan, dan pilih upload.
anda dapat melakukannya satu persatu atau semua file dan folder sekaligus
view me :


view me :


Tahap Akhir
Setelah anda selesai melakukan upload, pastikan anda menutup koneksi ke website, apalagi jika anda menggunakan internet dari fasilitas umum seperti warnet. Caranya, klik icon “disconnect from server”.
view me :


disconnect from server
Catatan kecil:
  1. Jika file anda ingin ditampilkan pada halaman depan, silahkan ubah dulu nama file-nya menjadi index.html, atau index.php
  2. Gunakan huruf kecil pada nama semua nama file anda.
    INDEX.HTML => tidak disarankan, index.html => baru benar.
  3. FileZilla yang digunakan disini hanya sekedar contoh, jika anda ingin menggunakan software FTP yang lain, anda dapat mencarinya di search engine dengan menggunakan kata kunci FTP.
  4. Jika anda ingin menambah FTP user, anda dapat melakukannya melalu FTP Manager pada Cpanel website anda.
Cara Mengupload website ke Hosting melalui File Manager
Cara kedua untuk melakukan upload file adalah melalui File Manager pada Cpanel anda. Login melalui http://www.namawebsiteanda/cpanel, misalkan: www.testing.com/cpanel silahkan gunakan username dan password yang telah dikirimkan ke e-mail anda. Setelah masuk ke Cpanel, klik dua kali pada icon “File Manager”.
view me :


Klik dua kali pada “File Manager”.
Kemudian pilih di folder mana anda akan meng-upload website anda tersebut, pastikan anda masuk ke dalam folder public_html terlebih dahulu. karena public_html adalah folder tempat file-file anda akan ditampilkan.
view me :


public_html
Bagian yang anda klik adalah foldernya, bukan pada tulisannya. Jika anda meng-klik pada tulisannya, maka yang akan ditampilkan adalah keterangan mengenai folder tersebut.

keterangan akan tampil dibagian kanan
view me :


Misal, anda ingin melakukan upload file pada subdomain latihan, maka anda harus masuk ke /public_html/contoh (folder latihan pada public_html).
Setelah itu, klik pada bagian upload file.
upload file
view me :


Maka anda akan sampai pada bagian ini.
view me :


Klik browse, untuk mencari file yang akan anda upload. 1 kali browse hanya dapat digunakan untuk 1 file.
Browse
view me :


Pencarian file yang akan di upload
view me :


Kemudian klik upload, untuk meng-upload file ke website anda. Jika anda pernah meng-upload file yang sama, maka centang pada bagian overwrite.
view me :


centang bagian overwrite
view me :


Maka proses upload pun selesai.
File manager hanya mampu menangani proses upload pada file, dan itu juga dibatasi hanya untuk 12 file per upload. Untuk folder, anda harus membuatnya secara manual, kemudian melakukan lagi proses upload pada folder tersebut. Untuk membuat folder dapat anda lakukan dengan meng-klik “Create New Folder” pada File Manager.
Catatan kecil:
view me :


Keterangan untuk folder di bagian kanan:
  1. Delete this folder and all files under it
  2. Rename this folder
    Untuk mengubah nama folder
  3. Change Permissions
    Mengubah permission pada folder
  4. Move this folder
    Memindahkan folder
  5. Copy this folder
    Menggandakan folder

Trash
view me :


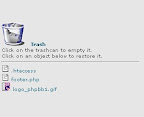
Fungsi trash hampir sama dengan recycle bin pada sistem operasi windows, digunakan untuk menyimpan sementara file2 atau folder2 yang akan dihapus dari website,
Up One Level
view me :


Digunakan untuk naik 1 tingkat ke folder sebelumnya.misal: jika anda sedang berada pada folder /public_html/contoh/ dan ingin kembali ke folder /public_html/ maka anda tinggal meng-klik dua kali pada up one level.
untuk tutorialnya dapat didownload di sini

Kamis, 05 Agustus 2010

Avant Guarde Phone Watches For Adolescents

All of us have seen the size of mobile phones reducing day by day. I know as a practice, we also knew that the size of the phones will further become thinner and thinner down the line. Currently the phone watch is the smallest mobile phone that is available.

These phones which look like watches also has mp3 and mp4 player and of course blue tooth. There are so many applications that are squeezed into such a small phone that you will pleasantly surprised..

To my surprise a phone such as the M810 series combines all features you would have in a regular PDA type of phone but also comes with a nice feature much like the iPhone, the touch screen ability and a stylus pen.

These cell phone watches screens can be described in TWO words! "OLED Technology", now here's something that if you haven't been introduced to yet, it is something you should all be looking forward to.
The phone watches comes with 2 built in speakers and microphones. You can use them just like any other mobile phone. You can answer calls; make calls etc with the help of these phones just like any other phone. Even playing games and listening to music or watching videos is never a problem with these phones.

The weight of this phone is just about 45 grams. The built in memory capacity is 128 MB and supports GPRS, WAP technology. They also supports MP3 and MP4 category of music with video recorder. The standby capacity of this phone is about 150 to 300 hours based on the usage. This phone watch is mostly liked by the younger generation as it is stylish and trendy.

Reff: http://www.readbud.com/

Microsoft Office Home & Student 2010 Step by Step

Microsoft Office Home & Student 2010 Step by Step
Microsoft Press | English | 2010-06-30 | ISBN: 0735627215 | Pages: 672 | PDF | 22.3MB

Teach yourself exactly what you need to know about using Microsoft Word, Excel®, PowerPoint®, and OneNote®-one step at a time! With STEP BY STEP, you build and practice new skills hands-on, at your own pace. Topics include creating effective documents; using themes, templates, and other formatting tools; building spreadsheets to perform calculations and manage data; producing and delivering compelling presentations; digitally organizing your notes and to-do lists; and other core topics.

CONTENTS:
Part I: Microsoft Office Home and Student 2010
* Chapter 1: Explore Office 2010
* Chapter 2: Work with FilesPart II: Microsoft Word 2010
* Chapter 3: Edit and Proofread Text
* Chapter 4: Change the Look of Text
* Chapter 5: Organize Information in Columns and Tables
* Chapter 6: Add Simple Graphic Elements
* Chapter 7: Preview, Print
, and Distribute Documents
Part III: Microsoft Excel 2010
* Chapter 8: Set Up a Workbook
* Chapter 9: Work with Data and Excel Tables
* Chapter 10: Perform Calculations on Data
* Chapter 11: Change Workbook Appearance
* Chapter 12: Focus on Specific Data by Using Filters
Part IV: Microsoft Powerpoint 2010
* Chapter 13: Work with Slides
* Chapter 14: Work with Slide Text
* Chapter 15: Format Slides
* Chapter 16: Add Simple Visual Enhancements
* Chapter 17: Review and Deliver Presentations
Part V: Microsoft OneNote 2010
* Chapter 18: Explore OneNote 2010
* Chapter 19: Create and Configure Notebooks
* Chapter 20: Create and Organize Notes

Minggu, 01 Agustus 2010

Antara Binatang dan Tumbuhan

Kepala Burung :

kepala burung


Penguin Terong :

penguin terong

Anjing Pisang :

anjing pisang

Kuda Tomat :

Kuda Tomat

Ayam Cabe :

Ayam Cabe

Kura-kura Melon :

Kura kura Melon

Ular Bunga :

Ular Bunga

Katak Kiwi :

Katak Kiwi

Harimau Pisang :

Harimau Pisang

e Book Web User Magazine

WebUser Magazine – 29 July 2010
English | PDF | 76 pages | 17.3Mb

The Sony Ericsson Xperia X10 Is An Impressive Smartphone

Due for release in the 1st quarter of 2010, the Sony Ericsson Xperia X10 boasts a plethora of useful features and is run by version 1.6 of the renowned Android operating system. As well as standard mobile phone features, this handset offers multimedia functions, internet access and an impressive 8MP camera.

The Xperia X10 measures 119x63x13mm and weighs in at 135 grams. Thanks to its slim profile and relatively light weight, it is an extremely comfortable handset to hold and use. The large 4 inch TFT capacitive touch screen is capable of displaying up to 65,000 colours at 480x854 pixels, offering bright, vibrant on screen images. An accelerometer is built in which senses when the phone has been tilted and automatically rotates the on screen image so it can be viewed in both portrait and landscape forms.

Users are alerted to incoming calls and messages by vibration and ringing, and can download polyphonic ringtones and utilize MP3 music files for this purpose. A composer is even included for the production of custom ringtones. A speakerphone is included for hands free communication and a 3.5mm audio jack accommodates hands free kits as well as headphones for listening to music.

Internal memory in the Xperia X10 is 1GB as standard. However thanks to a microSD slot with a pre installed 8GB memory card, up to 16GB can be accommodated offering generous storage for media files and other data.

In order to stay connected, Class 10 versions of both GPRS and EDGE are utilized. Connection to 3g networks is via HSDPA at speeds of up to 10.2 Mbps. HSUPA is available at up to 2Mbps. Wi-Fi connectivity allows users to take advantage of local wireless routers for an even faster internet connection. Bluetooth version 2.1 is installed as standard so users can directly transfer files and data between other compatible devices in the same vicinity.

As mentioned, the Xperia X10 is equipped with a digital camera boasting 8MP allowing high quality still images to be taken. This operates at a pixel resolution of 3264x2448 pixels. This includes such features as autofocus and LED flash, so high quality images can still be taken in low light conditions with the minimum of fuss. The camera also has the ability to shoot video in WVGA quality at a rate of 30 frames per second.

The handset's package of features includes a media player which has the ability to play several formats of both music and media files. Media files can easily be transferred to and from a computer by using the included microUSB (v2.0) port. Other entertainment options include a range of pre-installed games, and applications allowing direct access to websites such as Google and YouTube.

As mentioned, the operating system of choice for the Xperia X10 is Android version 1.6. In conjunction with a powerful Qualcomm QSD8250 Snapdragon 1GHz processor, demanding applications are handled with ease.

The Sony Ericsson Xperia X10 offers a well rounded package of functions and powerful hardware. Whilst it may not compete with several other available smart phones, it certainly holds it's own with offerings such as an 8MP camera.

The handset will be available in Sensous Black and Luster White. So not only is the Sony Ericsson Xperia X10 a powerful Smartphone, it is sure to appeal to many as a fashion statement as well.

Reff: http://www.readbud.com/

Wall Street & Technology - July 2010


Wall Street & Technology - July 2010
English | True PDF | 31 pages | 2.8 MB

Wall Street & Technology identifies information technology trends driving the securities and investment industries and focuses on emerging technologies for today's business challenges. Each issue targets mission applications that have an impact on the competitive advantage and probability of Wall Street firms.

Senin, 26 Juli 2010

Cara mengganti favicon pada BLOGGER

Standar favicon atau icon dari BLOG biasanya berupa huruf "B" yang berwarna orange+putih, huruf "B" sendiri diambil dari nama BLOGGER itu sendiri, nah kadang di situs-situs atau WEB yang berbayar untuk favicon dapat kita ubah sesuai dengan keinginan kita, nah sekarang pertanyaannya bisa tidak untuk mengubah favicon BLOG gratisan seperti BLOGGER...?? jawabannya TENTU saja BISA.

Mungkin sudah terlalu banyak artikel yang ngebahas tentang TRIK ini, namun bagi yang belum mengetahui trik ini bisa kok untuk menyimak dan mencobanya.

Trik ini sangat sederhana, namun bagi para NEWBIE kadang masih bingung, tanpa panjang lebar yuk langsung ke TeKaPe..
Langkah pertama LOGIN terlebih dahulu ke halaman "dasbor" kemudian klik rancangan, lalu pilih menu "EDIT HTML".

PENTING!!!
Sebelum melakukan perubahan pada menu ini, lebih baiknya untuk menyimpan template terlebih dahulu, untuk menyimpan template klik "Download Template Lengkap"

Apabila template sudah berhasil disimpan atau didownload, langkah berikutnya...
Beri tanda CENTANG atau CEKLIST pada "Expand Template Widget"

Kemudian cari kata:

Lalu COPY dan PASTE script berikut tepat di atasnya:

Untuk mengganti jenis icon yang lain, gantilah script ini:

http://us.i1.yimg.com/us.yimg.com/i/mesg/emoticons7/11.gif

Script atau icon yang digunakan pada BLOG ini yaitu icon emotion "KISS" pada Yahoo! Messenger.

Langkah terakhir klik "SIMPAN TEMPLATE" dan untuk melihat hasilnya refresh halaman BLOG kamu. OKE..

Yups selamat mencoba semoga bermanfaat. :D
Reff: dari berbagai sumber...(Simbah Google)

Selasa, 20 Juli 2010

How To Avoid Guests Tapping Their Glasses

I am sure you have been to a wedding reception in Michigan before, and you had to deal with the "clinking" of the glasses to watch the bride and groom kiss. Every 5 minutes someone will start the headache by tapping their champagne glass repeatedly until everyone in the room follows suite. How do you avoid the clinking of the glasses? Read our article below for some great tips that will keep your guests involved and you guys kissing.

A Little History

Many of you are probably wondering how the whole tradition of guests clinking their glasses at wedding receptions started. The 'clinking' of glasses originates back to medieval times when wine was usually poisoned. If a host wanted to prove to their guests that the wine wasn't poisoned, he would pour some of the guest's wine into his glass and drink it first. If the guests trusted their host they would clink glasses when the host offered his glass for a sample. Hence the clinking of glasses has become a sign of trust, honesty, and toast to good health.

Sing a Love Song

One great way to avoid the clinking of the glasses is to have tables sing a song with the word love in it instead. Not only is this fun, but it gives guests the chance to mingle and brainstorm a song together. It is great to do this during dinner when soft music is playing in the background. Next thing you know, tables are standing up and singing, in perfect harmony... I can tell you one thing; it is not always perfect harmony. Some common songs guests have come up with on their own are listed below:

All For One - I Can Love You Like That

Elvis Presely - I Can't Help Falling In Love with You

Norah Jones - Love Me Tender

Etta James - At Last

Barney - I Love You (I know what you're thinking)

Frank Sinatra - Love & Marriage

B52's - Love Shack

The Outfield - Your Love

Joann Jett - I Love Rock n Roll

Sarah Bareilles - Love Song

Countours - Do You Love Me

Beyonce - Crazy In Love

Haddaway - What Is Love

The Darkness - I Believe in a Thing Called Love

Rod Stewart - Have I Told You Lately That I Love You

soft Cell - Tainted Love

Tim McGraw Ft. Faith Hill - It's Your Love

Maroon 5 - This Love

Lady Gaga - Love Game

Doors - Love Her Madly

Bob Marley - Is This Love

Bon Jovi - You Give Love A Bad Name

R. Kelly - Step In The Name Of Love

The Shirellas - Going To The Chapel Of Love

Four Tops - I Can't Help Myself

2Pac - California Love

Diana Ross - Stop In the Name of Love

Harry Connick Jr - Receipe for Love

Tim McGraw - I Like It I Love It

Elton John - Can You Feel the Love Tonight

Have Guests Tell A Story

Another unique way to avoid the clinking of the glasses is to have guests tell a story about you over the microphone during dinner. This quick speech does not have to be formal; it can simply be about a funny story, something sentimental, or just some insight into the guests of honor. It can be either about the bride or the groom. This is great, because it breaks up the typical down time people experience during dinner. On average, you will get 8-12 people to volunteer to talk about. But be careful what you wish for, some of these stories might be embarrassing!

Give Them Something to Ring

Get it, ring! Besides your wedding bands, you can put little bells on the table that replace the clinking of the glasses. This is more common than the two suggestions above. There are companies online that specialize in selling these bells for your wedding day. You can even put sentences or photos about wedding day attached to the bells. A nice alternative to glass clinking, but it still might give you a headache.

Mirror Kiss

Majority of people attending a reception will bring a date. So why not have the guests kiss, and have the guests of honor recreate the kiss. What will happen is that the guests will walk to the head table, do a kiss a certain way, and have the bride and groom recreate that kiss. Variations include dip+kiss, spin+kiss, long kiss, slow run towards each other+kiss. I think the last one is the most hilarious!

These are just 4 ways to switch up the traditional activity of tapping the glasses. There is no right or wrong way to do anything for a wedding, just your way. If you have a comment or suggestion, then feel free to leave it on our wedding blog.

Reff: http://www.readbud.com

Jumat, 16 Juli 2010

What Vitamins Should I Take To Improve My Hair, Skin And Nails?

The biggest news recently about beauty, especially hair, skin, and nail health, revolves around the ability of vitamins and minerals to help skin be healthy and young looking. Nutrients, vitamins, and minerals can promote hair growth, healthier looking hair, and help strengthen nails so they don't chip and break. This means not just nutrients found in lotions and creams that go on the skin, but those that are found naturally in the food we eat, and in vitamin and mineral supplements that can be taken to help improve hair, skin, and nails from the inside out.

Vitamin and mineral supplements added to a healthy diet can make such a difference that you don't need to spend a lot of money on a full regimen of skincare products. Fortunately, most of the same things that are good for your skin will also work to give you healthy hair and nails; that makes taking a supplement so much simpler!

Vitamins C and E
As far as your skin goes, both vitamin C and E are very important in stopping the negative effects of too much exposure to the sun, such as wrinkles and ageing. Vitamin E has been shown to decrease sun damage and wrinkles and smooth out the texture of skin. Long term use of both of these vitamins can reduce the chances of getting sunburnt and vitamin C can help with collagen formation.

For skin, hair, and nails, both vitamin C and E act as antioxidants. Vitamin E and C improve blood circulation (and nutrient delivery) to the scalp, resulting in healthier hair. C and E taken as a supplement and in a topical lotion can reverse the damage caused by free radicals, and help replace collagen and elastin.

Vitamin C also promotes healthy nails. Hangnails can be caused by a deficiency in Vitamin C. You can get vitamin C from leafy green vegetables, citrus (such as a lime, grapefruit and oranges), and cherries. A powder form of supplement is probably the easiest way to digest synthesised vitamin C. Just mix it in with juice.

Vitamin A
If the levels of vitamin A in your body are too low, you may experience things like dry and flaky skin as well as dry scalp. Vitamin A is important for maintaining healthy skin and repairing damaged skin. There are also vitamin A lotions that can significantly reduce wrinkles, and even help control acne.

Taking a vitamin A supplement (or beta carotene) helps the scalp produce the oils it needs to avoid flakiness and dryness. Pregnant women need to seek advice before taking vitamin A and everyone needs to be careful not to over do it. Too much can be toxic.

Vitamin K
In our bodies, the job of vitamin K is to help with blood clotting. For the skin it works to reduce dark circles under the eyes as well as fade bruising, especially when used as a topical cream. Vitamin K is made by bacteria in the gut so keeping your insides healthy helps with the production of vitamin K. A routine to support the intestines and stomach may be one way to keep your good tummy bugs happy and healthy – and busy producing vitamin K.

Biotin (Vitamin B7)
One of the B vitamins, biotin, may one of the most important supplements you can take for you skin, hair and nails. Biotin (B7) is a nutrient contained the cells of our hair, nails, and skin. When you don't have enough biotin, itchy skin and scalp result as well as hair loss. Try a multi-B supplement that contains biotin and as well as Niacin, B5, B6, and B12, all of which are important for healthy skin, hair and nails.

Minerals for Hair, Skin, and Nails
Like vitamins C and E, the minerals copper, selenium and zinc, can help develop elastin to make skin tighter and smoother. They also have other benefits and are usually included in good multi-vitamin supplements specifically for hair and nails.

Check with Your Doctor
Before you begin taking anything new, it's always a good idea to check with your doctor to make sure that they won't have any negative reactions with any medications you may be taking. The doctor can also advise you on safe dosages to take each day. Be sure to read the label and only take the recommended daily dose.

As complementary therapies are not tested in the same way as pharmaceutical drugs they have varying levels of effectiveness, so try a few different brands till you find a product that works well for you.

Reff: http://www.readbud.com/

Kamis, 15 Juli 2010

How To Take Good Animal And Insect Pictures

Many times people think they can only take amazing wildlife pictures away from home, but many times, you can get great pictures right in your own backyard.

Photographing Furry and Feathery Wildlife

Depending on where you live, there are many ways to turn your yard into a wildlife haven for squirrels, raccoons, birds, deer, frogs and other critters.

If you want to feed wildlife, don't feed them food from your cupboard but instead follow the wildlife attraction and sustainability tips from the National Wildlife Federation so you can be sure you're helping them and not hurting them.

By following the advice from wildlife experts, you will also be creating an environmentally friendly landscape that will be good for the animals and the environment.

Take some time to read up on the species you want to photograph so you can better understand their habits and hopefully take better pictures of them. And you will be better able to avoid attracting potentially dangerous predators into your yard. You should also look at the code of ethics for professional nature photographers on the North American Nature Photography Association's website (nanpa.org).

Just as with photographing pets, when you take a picture of a furry or feathery wild critter, follow these guidelines:

-Use natural lighting to your advantage
-Fill the frame with the subject
-Focus on the eyes
-Shoot from various angles
-Capture personality


Photographing Insects

Wildlife photography also includes the tiny world of insects. Honeybees, dragonflies, butterflies, bumblees, spiders and even snails are all popular subjects.

Photographing insects can be tricky. Here are some tips from the pros to help:

-Like with larger wildlife, it will help to know your subject's patterns of behavior. Watch where the butterflies land and see if they prefer one flowery shrub more than the others. Then stake it out and wait for the subject to come to you. And be ready!

-To get the best shots of small creatures at rest, use macro mode and fill the frame. Your camera's manual will tell you how close your macro mode works. If you stay within the proper range and hold your camera steady, you will get some nice, crisp shots.

-You should use sports mode or flash to freeze action unless the insect is sitting very still.

-Most insects are very sensitive to carbon dioxide and will run or fly away if you breathe directly on them. So when you lean in close for your close up, hold your breath! However, there are some insects like beetles that will freeze when you breath on them.

-Keep in mind some insects and spiders pack powerful, even deadly venom, so know your bug before approaching.

-Try to take pictures in early morning or twilight because insects slow down with cooler temperatures and it will make it easier to shoot a picture. Insects can see shadows very well so don't approach from the same direction as the light casts.

Photographs of wildlife can make for beautiful fine art, the type that you'll want to frame and display proudly and give as gifts. You can also use your animal or insect pictures in photo crafts like in calendars or greeting cards. There are simply lots of wonderful things you can do with your beautiful animal and insect pictures so have fun capturing the wonderful world of nature.

Reff: http://www.readbud.com/

Minggu, 11 Juli 2010

Cara Menambah Meta Tag di Blogspot

Sekarang saatnya kita mulai belajar tentang Meta tag. Mungkin Meta Tag sudah tidak begitu populer lagi seperti dulu, namun meta tag masih sangat penting untuk blog kita. Khususnya jika kita ingin blog kita diindex dengan mudah oleh Google dan teman-temannya seperti Yahoo, MSN dll. Mungkin memang benar kalau Meta Tag bukan menjadi satu-satunya faktor yang membuat blog kita search engine frienly. Tetapi Meta Tag tetap mempunyai peran yang penting untuk Google, Yahoo, MSN, dll untuk mengindex blog kita dengan lebih baik. Mungkin buat para wordpress mania, apalagi yang hosting sendiri mungkin tidak ada masalah dalam memasukkan meta tag, namun beberapa pengguna blogger banyak yang merasa kesulitan dalam memasukkan meta tag ke blog mereka. Berikut ini adalah tips bagaimana caranya memasukkan meta tag ke blog blogger:

1. Login ke account blogger anda dengan memasukkan email dan password. Setelah anda masuk pada blogger dashboard/dasbor anda, pilih tab layout (tata letak).

2. Setelah itu akan muncul menu page element (elemen laman), Font and colour, Edit HTML, dan pilih template baru. Pilih edit HTML.

3. Backup templates anda dan simpan di komputer anda sebelum mengeditnya. Agar kalau ada error bisa dikembalikan ke bentuk semula dengan memasukkan HTML yang disimpan tadi.

4. Cari kode HTML seperti dibawah ini :
=====================================================================================

<b : include data=’blog’ name=’all-head-content’>

=====================================================================================
Agar lebih mudah dalam pencarian, takan Ctrl+F, copy kode di atas dan paste-kan pada kotak pencarian yang ada setelah anda tekan Ctrl+F. Dan setelah ditemukan, maka kode itu akan muncul dengan highlights. Copy dan paste kode berikut tepat dibawah kode yang ada di atas.
=====================================================================================

<meta content=’Description Blog‘ name=’description’/>

<meta content=’Keywords Blog‘ name=’keywords’/>

<meta content=’Nama Author‘ name=’author’/>

=====================================================================================
6. Ganti Description Blog dengan description blog anda, Keyword Blog dengan keyword blog anda, Nama Author dengan nama author anda. Ganti sesuai dengan blog anda.

7. Preview blog anda, jika tidak ada yang error langsung klik save.

8. Dan sekarang blog anda sudah memiliki meta tag dan siap terindex oleh Google, Yahoo, MSN dan yang lainnya dengan lebih baik.

Keterangan:
1. Apabila dalam mencari kata

<b : include data=’blog’ name=’all-head-content’>

tidak ketemu centang terlebih dahulu pada option Expand Template Widget.
2. Apabila terjadi error dalam proses penyimpanan mungkin masalahnya ada pada koma atas, maka tanda baca yang koma atas dihapus terus diganti lagi dengan koma atas dari keyboard anda.

Semoga Berhasil

Reff: http://wine16.wordpress.com/2010/03/26/cara-menambah-meta-tag-di-blogspot

Jumat, 09 Juli 2010

4 Secrets You Need To Know About Fat Loss

Fat loss is one of the hardest thing for anyone to do. You eat right, exercise your butt off and still you see the unsightly jiggles in the mirror. What is going on?

First of all, you don't have to be obsessive about losing fat. If you are eating right and working out the way you are supposed to, the first thing a trainer would say is tighten your diet; cut out more carbs, eat more protein in smaller amounts five or six times a day and do more circuit training. This could turn into a full time job!

Thanks to modern science we are finding out some more truths about fat. Perhaps these facts can help guide us to the right way to lose fat and the excess weight that may come with it.

Secret #1 - According to studies from the Toxicology Data Network of the National Library of Medicine, PCB's and dioxins stay in our bodies and cause problems that affect the hormones. One of the most common health issues noted is hypothyroidism.

Hypothyroidism interferes with kidney function, causing fluid retention. It affects your digestion and can cause constipation. It is also known to slow metabolism and cause fatigue. All of these problems can lead to easier weight gain, fat storage and makes it harder to lose the fat once packed on.

Secret #2 - Many environmental toxins are stored in fat cells and the tissue surrounding fatty areas. Ongoing studies such as reported by the International Journal of Obesity, finds that these toxins are lipophylic, or fat loving. They are resistant to metabolic breakdown. This means, they store in your fat and don't want to leave.

In fact, one study goes so far as to say that white adipose tissue (fat) is a reservoire for pollutants. And we thought the body could detox itself, all this time.

Secret #3 - Studies on obesity are researching the effects of losing weight and fat and the hidden dangers as the stored toxins are released into an already sluggish body. So now it seems that losing weight may even be detrimental to your health. So what are we to do?

Modern ideas are always found to be crazy at first, Like the idea of a body cleanse. But cleansing and detoxifying the body is not such a far-fetched idea. Think about the above facts; environmental toxins are stored in fat and they resist our own body's attemt to break them down. It seems like helping the body with cleansing is right on track.

Our bodies do have organs in place to help detoxify things that are not supposed to be in us. But studies are showing that these toxins do not leave as easily as once thought. We are bombarded on a daily basis through our food, drink and air. Studies in Texas show that some areas of people, land, water and even birds have high levels of DDT, even though it was banned in the 70's.

Secret #4 - Using a fat loss cleanse or a weight loss detox is a new twist on losing fat for the future. Detox diets can work with your bodies' circadian rhythm to strengthen digestion, metabolism and liver.

Body cleansing supplements help your body work harder to dislodge environmental toxins and ensure they leave the body instead of wreaking havoc. There are also many fat loss supplements on the market that are known to help the body detoxify and eliminate toxins and the fat they are stored in.

Instead of the usual diet and exercise, check out a fat loss cleanse and see if it may be your answer. Thousands upon thousands of people all around the world find it helps them. It may be just what you are looking for.

Reff: http://www.readbud.com

Selasa, 06 Juli 2010

The Newly Rebranded Samsung Genio Slide B5310

This is the phone that is known by so many names. Whatever you want to call it - Samsung Genio Slide B5310, Samsung Genio Pro or Samsung CorbyPro B5310, it's still the same reliable mobile phone that you will surely love. The reason for the many names is that Samsung decided to name it differently when it was released in the UK and elsewhere. Then, when Vodafone secured the exclusive rights to this model, it decided to rebrand the phone under the Genio Slide name.

Lately, it's becoming common for networks to do a last minute name change when it comes to the mobile phones they're carrying. For example, T-Mobile released the Samsung i5700 under the new brand name Samsung Galaxy Spica. This practice actually makes it confusing for a lot of people, but there's no stopping the networks from doing this.

What Does It Look Like?

This phone measures 105 x 57 x 16 mm and weighs only 135 grams. It features a TFT resistive touch screen display that measures 2.8 inches, supports up to 16M colours and has a resolution of 240 x 320 pixels. Unlike most touch screen mobile phones today, this features a full QWERTY keyboard to make it even easier for you to type your messages. It also comes with a built in accelerometer sensor to auto rotate the phone. It comes in only one colour (black), but you can easily customise the phone by using a fashion jacket, which is a colourful changeable battery cover.

What Does It Have?

When it comes to specifications, this phone is one of the best. It has an internal memory of 150 MB which can support up to a maximum of 1000 contacts. If you feel the need to expand the memory, you can do this easily using a microSD memory card up to 16 GB.

This phone has a standard 960 mAh lithium ion battery that can last for up to 560 hours on standby mode and 8 hours of talk time. It has a built in 3.15 megapixel camera that has smile detection and geo tagging. The images taken from this camera has a maximum resolution of 2048 x 1536 pixels. You can also use the camera for taking video clips (QVGA) at 15 frames per second.

What Does It Do?

This phone supports 2G network connectivity (GSM 850 / GSM 900 / GSM 1800 / GSM 1900) as well as 3G (HSDPA 900 / HSDPA 2100). It supports Class 10 GPRS (4 +1/3 +2 slots) at 32 to 48 kbps as well as Class 10 EDGE at 236.8 kbps. HSDPA data transfer can reach speeds of up to 7.2 Mbps.

It also has Wi-Fi at 802.11 b/g. To make it even easier for you to share files, this mobile phone comes with Bluetooth 2.1 with A2DP as well as a micro USB 2.0 port.

TheSamsung Genio Slide B5310can support SMS, MMS, IM and email messaging, and features a WAP 2.0 / xHTML browser for a better internet surfing experience.

Reff: www.readbud.com

Minggu, 27 Juni 2010

Daftar Nomor Depan Operator GSM / CDMA di Indonesia

ntuk memberikan informasi tambahan bagi pembaca blog, terutama yang ingin mendapatkan nomor depan / nomor prefix setiap operator GSM dan CDMA , maka di artikel kali ini, saya ingin sharing-kan list / daftar nomor depan semua operator GSM dan CDMA yang tersebar di Indonesia. Terdapat nomor prefix operator terkenal sampai provider yang belum ternama. Ada Telkomsel, XL, Indosat Mentari dan IM3, kartu Fren, kartu Smart dan lain sebagainya.Inilah kumpulan daftar nomor depan / nomor prefix operator selular di Indonesia:

1. 0811……. = Telkomsel Kartu Halo
2. 0812……. = Telkomsel Kartu Halo / Simpati 11 digit
3. 0813……. = Telkomsel Simpati
4. 0814……..= Indosat Matrix 3G ( IM2 )
5. 0815……..= Indosat Matrix / Mentari
6. 0816……..= Indosat Matrix / Mentari
7. 0817……..= XL Prabayar & Pascabayar
8. 0818……..= XL Prabayar & Pascabayar
9. 0819……..= XL Prabayar & Pascabayar
10. 0859……..= XL Prabayar & Pascabayar
11. 0878……..= XL Prabayar & Pascabayar new!!
12. 0828……= Sampoerna Telekom Ceria (Prabayar & Pascabayar)
13. 08315….= Lippo Telecom Prabayar & Pascabayar (Area Jatim)
14. 0838……= NTS 3G Prabayar & Pascabayar
15. 0852……= Telkomsel Kartu As
16. 0853……= Telkomsel Reserve (dulunya Telkom Mobile)
17. 0855……= Indosat Matrix Bright
18. 0856……= Indosat IM3…..
0857… = Indosat IM3
19. 0858……= Indosat Mentari
20. 0868……= PSN (Satelit GSM) Byru (Prabayar & Pascabayar)
21. 0881-0887….= SMART (Prabayar & Pascabayar)
22. 0888-0889… = Fren Prabayar & Pascabayar
23. 0898-0899….= Three Prabayar & Pascabayar
24. 0868………….. = BYRU Satelit dan PASTI Satelit

Merekam aktivitas Komputer

Ada kalanya kita membutuhkan rekaman tentang suatu kegiatan pada desktop komputer kita, misalnya seorang penulis buku mengenai atau yang berhubungan dengan tutorial, hendak membuat video tentang tutorial yang dibahas dalam bukunya, atau dosen yang hendak membuat tutorial tentang matakuliah yang diampu. Hal ini sangat penting karena lebih mudah untuk mengikuti tutorial yang langsung dilihat secara langsung bagaimana prakteknya daripada sekedar membaca atau mendengarkan saja. Ada berbagai macam aplikasi/software untuk merekam aktivitas desktop komputer dan merekamnya sebagai video. Anda dapat merekam aktivitas desktop komputer ke dalam film untuk membuat demo, tutorial atau bahkan presentasi. Yang Anda butuhkan hanyalah sebuah aplikasi/software, ini salah satu aplikasi/software yang dapat digunakan untuk merekam, aplikasi ini disamping mudah cara penggunaannya, juga sangat kecil kapasitasnya hanya sekitar 1.3 MB. Apabila anda hendak mencoba, silahkan download lalu instal di komputer anda. Apabila aplikasi berhasil diinstal, jalankan aplikasi tersebut, untuk hasil rekaman seluruh layar monitor pilih "Full Screen" pada menu "Region". Klik tombol "Record" atau tekan "F8" pada keyboard, untuk memulai merekam aktivitas desktop Anda, gerakan mouse dan aktivitas lainnya akan terekam. Untuk default file (.AVI) dengan rasio kompresi tertinggi. Untuk menghentikan sejenak (Pause) tekan "F8" pada keyboard.( Tekan F8 untuk Record/Pause )

Untuk menghentikan perekaman setiap saat tekan tombol "F9" pada keyboard. aplikasi ini juga dapat merekam suara bersama dengan gerakan.

Klik disini untuk mendownload aplikasi tersebut. Selamat mencoba.


Jumat, 25 Juni 2010

Seandainya Irak menang dari Amerika

Judul Spoiler [Adikuasa menjadi adiguna] :


Judul Spoiler [KF*] :


Judul Spoiler [New Yo*k city] :


Judul Spoiler [McHammed] :


Judul Spoiler [Liber*y si pemalu] :


Reff: http://unic77.blogspot.com/2010/06/seandai-nya-irak-menang-lawan-amerika.html

Gambar GOKIL

Lihat, amati, kasih Komen...wokey....Hehehehe...

Judul Spoiler [Tangan Panjang] :


Judul Spoiler [Penari Balet tanpa kepala] :


Judul Spoiler [Tanpa kepala bisa membaca] :


Judul Spoiler [Tanpa kepala masih bisa beraktifitas] :


Judul Spoiler [Orang dengan kepala lampu] :


Judul Spoiler [Orang dengan kaki besar dan tinggi tapi badan normal] :


Judul Spoiler [Tembus pandang] :


Judul Spoiler [Merobohkan menara Pisa] :


Judul Spoiler [Three Point Shoot] :


Judul Spoiler [Kaki bercabang 3] :


Reff: http://unic77.blogspot.com/2010/06/hasil-jepretan-photograper-yg-unik.html

Hamsterku Kelaparan, Kasih makan dong...

 
Design by Wordpress Theme | Bloggerized by Free Blogger Templates | coupon codes